Orchard Coreのインストール
2018/01/24
Visual Studio2017を用意
自宅で遊ぶにはVisual Studio Community。.Net Core 2.0以上が必要です。
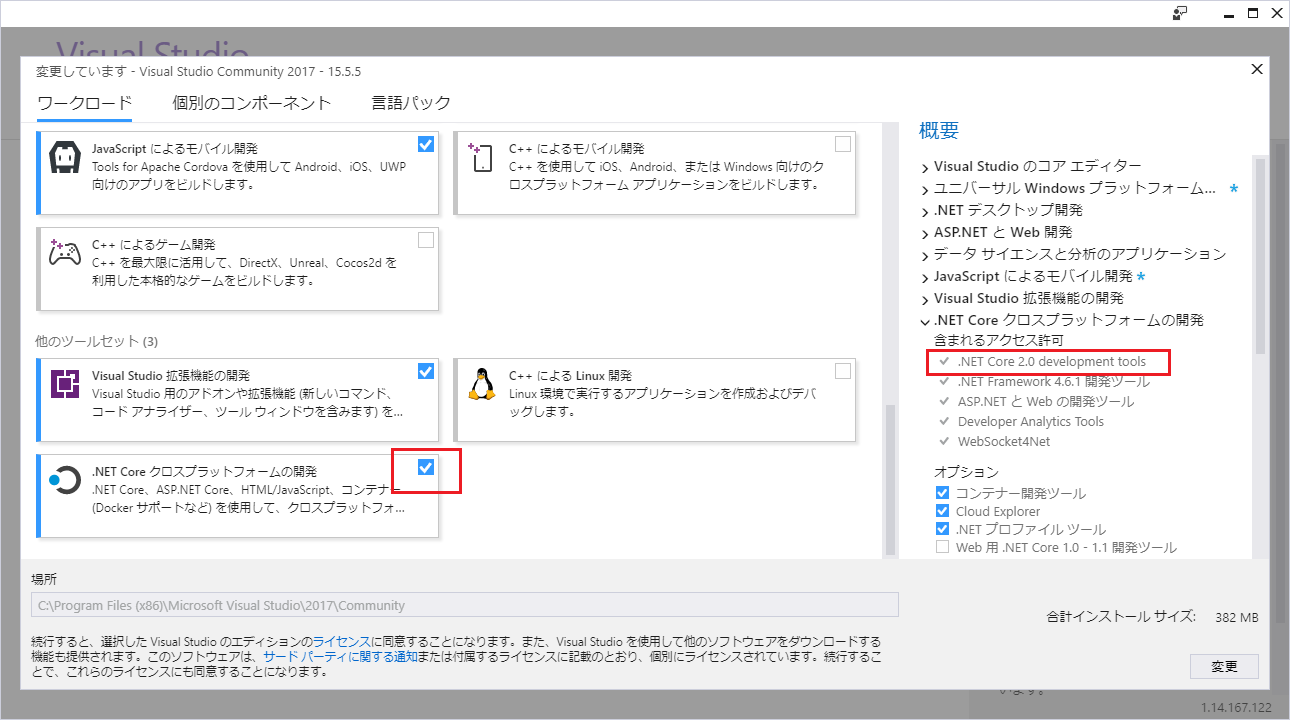
既にVisual Studio2017をインストール済みで、上記にチェック入れていなかった場合は
「すべてのプログラム」からVisual Studio Installerを再度実行します。
ASP.NET Coreのプロジェクト作成
ASP.NET Core Web アプリケーションを選択。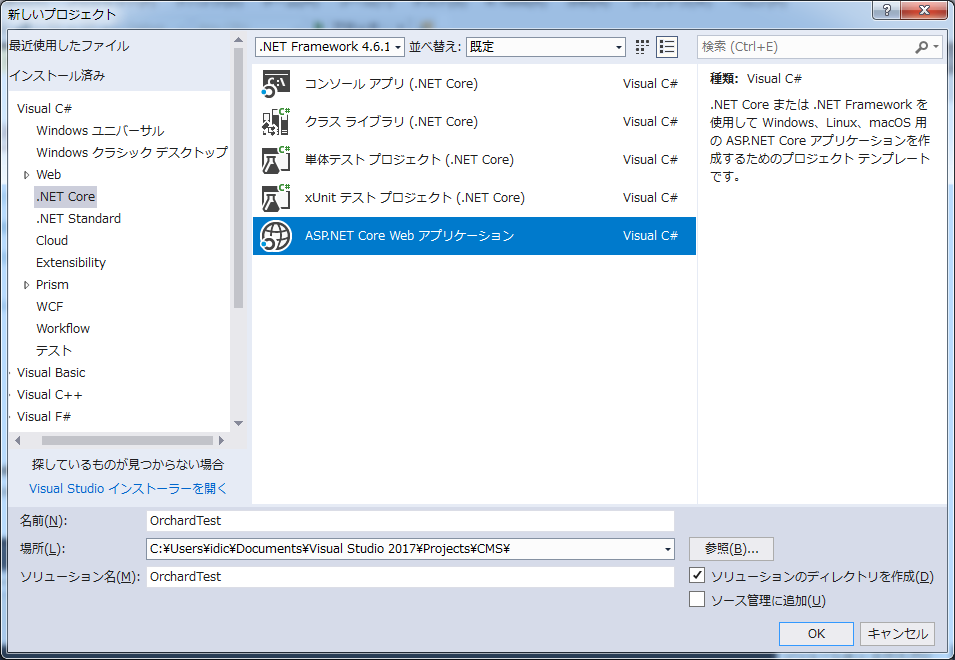
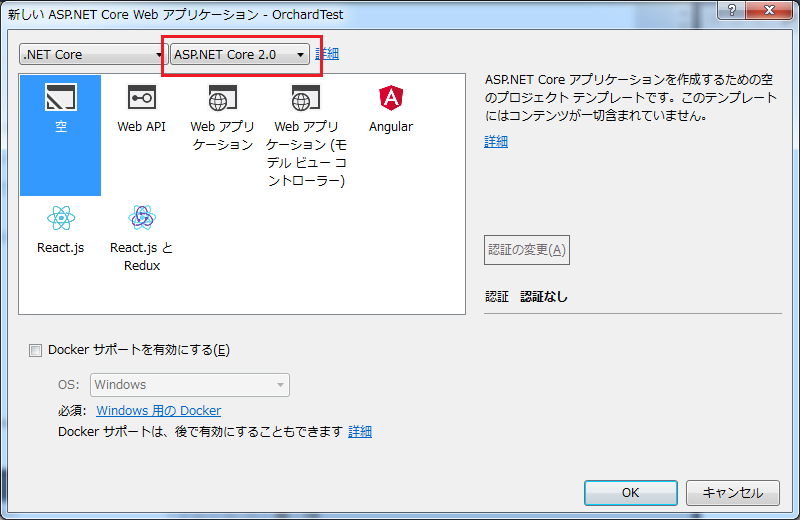
「空」を選択(上のドロップダウンで ASP.NET Core 2.0(あるいは2.1)になっていることを確認)。
NuGetでパッケージ追加
ソリューションのパッケージの管理を開く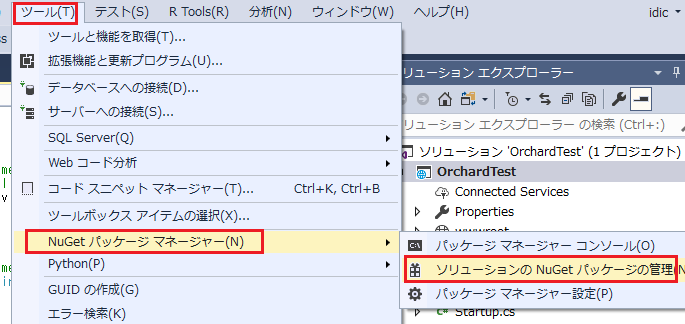
OrchardCore.Application.CMS.Targets で検索。
(2018/01/27現在、プレリリースを含めるにチェックを入れないとヒットしない)

プロジェクトを選択して「インストール」をクリック。
インストール中何度かポップアップの確認画面が出ます。
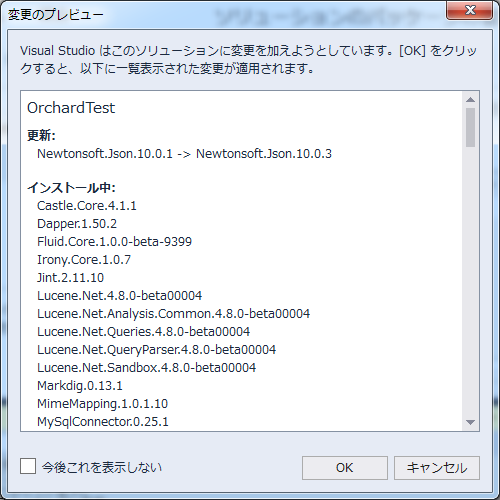
インストールが完了すると依存関係の下に大量のdllが追加されています。
(依存関係に警告マークが出ている場合は、消えるまで待ちます)

Startup.csを編集
public class Startup
{
    // This method gets called by the runtime. Use this method to add services to the container.
    // For more information on how to configure your application, visit https://go.microsoft.com/fwlink/?LinkID=398940
    public void ConfigureServices(IServiceCollection services)
    {
        // 下記を追加
        services.AddOrchardCms();
    }

    // This method gets called by the runtime. Use this method to configure the HTTP request pipeline.
    public void Configure(IApplicationBuilder app, IHostingEnvironment env, ILoggerFactory loggerFactory)
    {
        loggerFactory.AddConsole();

        if (env.IsDevelopment())
        {
            app.UseDeveloperExceptionPage();
        }

        //app.Run(async (context) =>
        //{
        //    await context.Response.WriteAsync("Hello World!");
        //});
        // 上記をコメントアウトして下記を追加
        // beta2になってから記述変わりました(リファクタリングの影響でしょうか?)
        //app.UseModules();  // Core2.0(Orchard beta1)
        app.UseOrchardCore();  // Core2.1(Orchard beta2)

    }
}
初期設定
実行すると初期設定の画面が立ち上がります。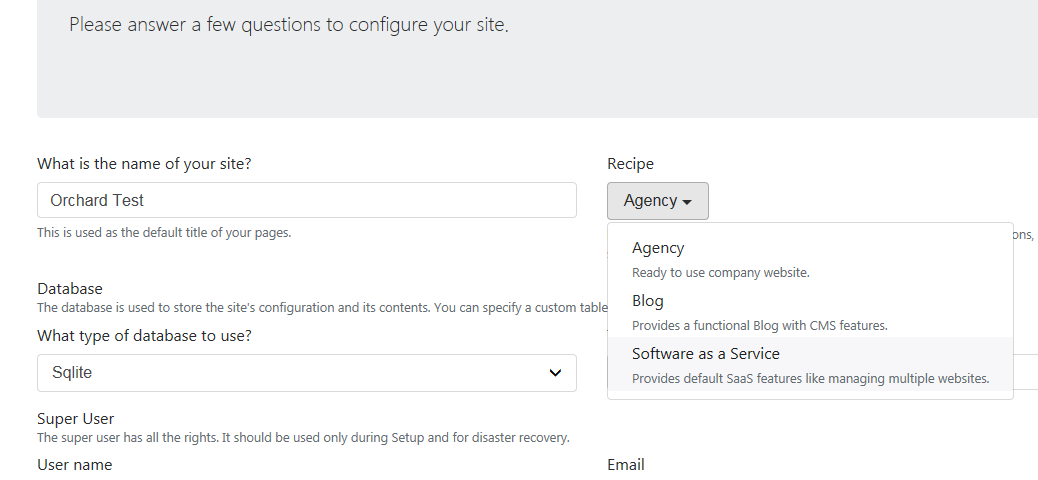
データベースはSQL Serverはもちろんのこと、PostgreSQL、MySQLにも対応しています。
レシピはAgency(企業向けサイト用)、Blog(ブログ用)、SaaS(マルチテナント用?)の3つ。
とりあえず一番上のAgencyを選択。
レスポンシブル(bootstrapが使われています)な今風のサイトがたちあがりました。
※なんか既視感あると思ったら、Orchardの本家サイトが同じAgencyのテーマを使っているようです。